With version 1.7 of the SharePoint Framework (SPFx), Microsoft introduced the possibility to create Tabs in Microsoft Teams using the SharePoint Framework. This means already made investments in SharePoint web parts using SPFx, can now be ported to teams. One development method for both services! Thats a nice addition. And it also works the other way around.
Today I am going to take an already developed web part and see what it takes to get it into Microsoft Teams.
Setup
As mentioned you will need to setup your development environment with at least version 1.7 of the SharePoint Framework. I generally use a Docker image for this, but there are other options to your desire.
When your development environment is setup you can scaffold your project using the Yeoman generator For SharePoint Framework:
yo @microsoft/sharepointFollow the steps as you would normally do for creating a web part.
Project structure
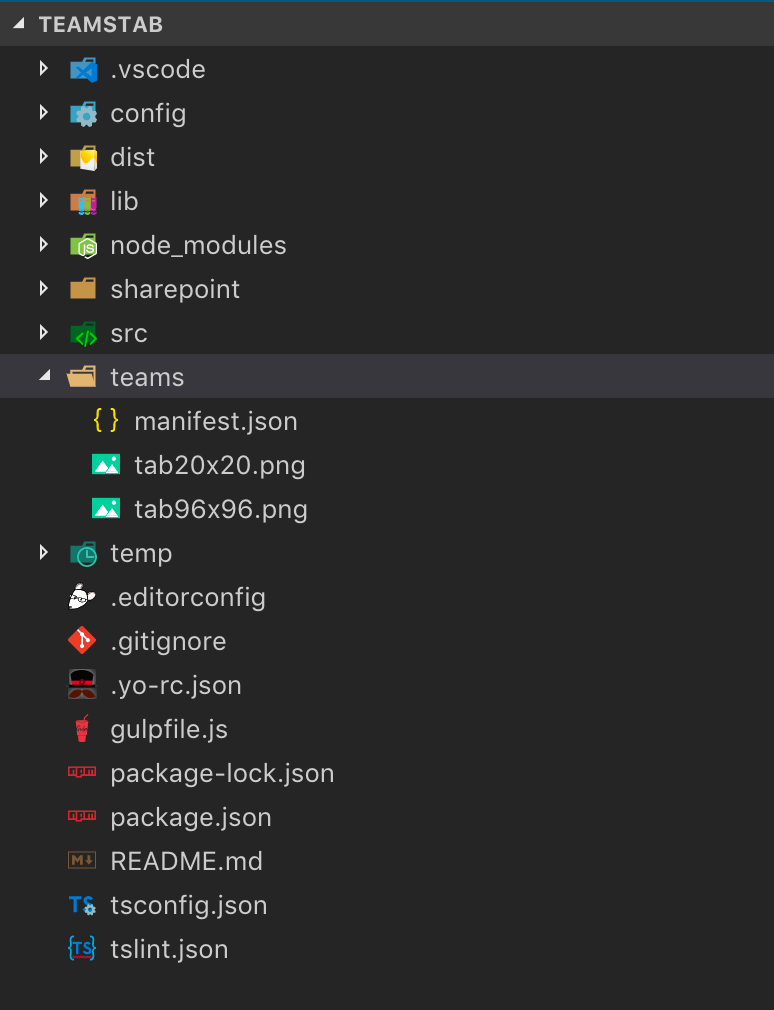
When you scaffold a new web part project using the Yeoman generator, you will notice since the 1.7 version, a new folder is present. It is called teams and will hold 3 files by default. 1 is your Teams manifest file, which is used when you upload your project to Teams. The other 2 files are png files, which will be used as the icons in the App catalog. The manifest.json describes your app. You can define the name and description, Url’s to your website and privacy and terms of use pages. All these will be configured for you by the Yeoman generator, but can be adjusted to your needs.
Deploy to SharePoint
Before we can add the web part as a tab in Microsoft Teams, we will first need to deploy the web part to SharePoint. This is where your code will be hosted. Important to notice here, is that you could host SPFx packages in two ways: at tenant level in the App catalog or at site collection level in the site App catalog.
Tenant level deployment
When we deploy the SPFx web part at tenant level, in the tenant App catalog, it is important that the web part will be available to the site collection connected to the Team where we would like to add the web part as a tab. This could be done in 2 ways. Either install the app within the connected Site collection, or during the installation in the tenant select the option to automatically install it to all Site collections. In the last option the web part is available to all Site collections.
Site collection level deployment
SPFx web parts can also be deployed at Site collection level. Advantage is, the web part is only available there. So if you want to really scope a web part to a certain Site Collection (or Team), this is a valid option. Before you can install a web part, you first need to add a Site collection App catalog. More information on how to add a Site collection App catalog can be found here.
Deploy to Microsoft Teams
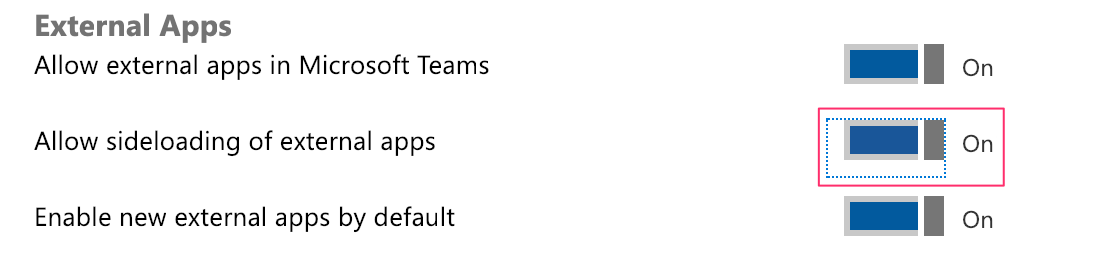
Now we have made the web part available within SharePoint, just as you would normally do, we now going to make it available as a Tab within a Microsoft Team. Before we can do this, we need to set a tenant level setting, in order to allow sideloading of external apps. By default this is turned of. So we first need to manually switch it on. The tenant level setting can be found in the Office 365 Admin center. You go to Settings -> Services & add-ins -> Microsoft Teams. In the External Apps section you can switch the option on:
Now we can install external apps within Teams, we first need to create a zip package of the manifest file, created in your SPFx project. So go to your project and go to the ‘teams’ folder. Open it in Finder or explorer and package all the files within this folder and give it a name. For instance: SPFxTeamsTab.zip.
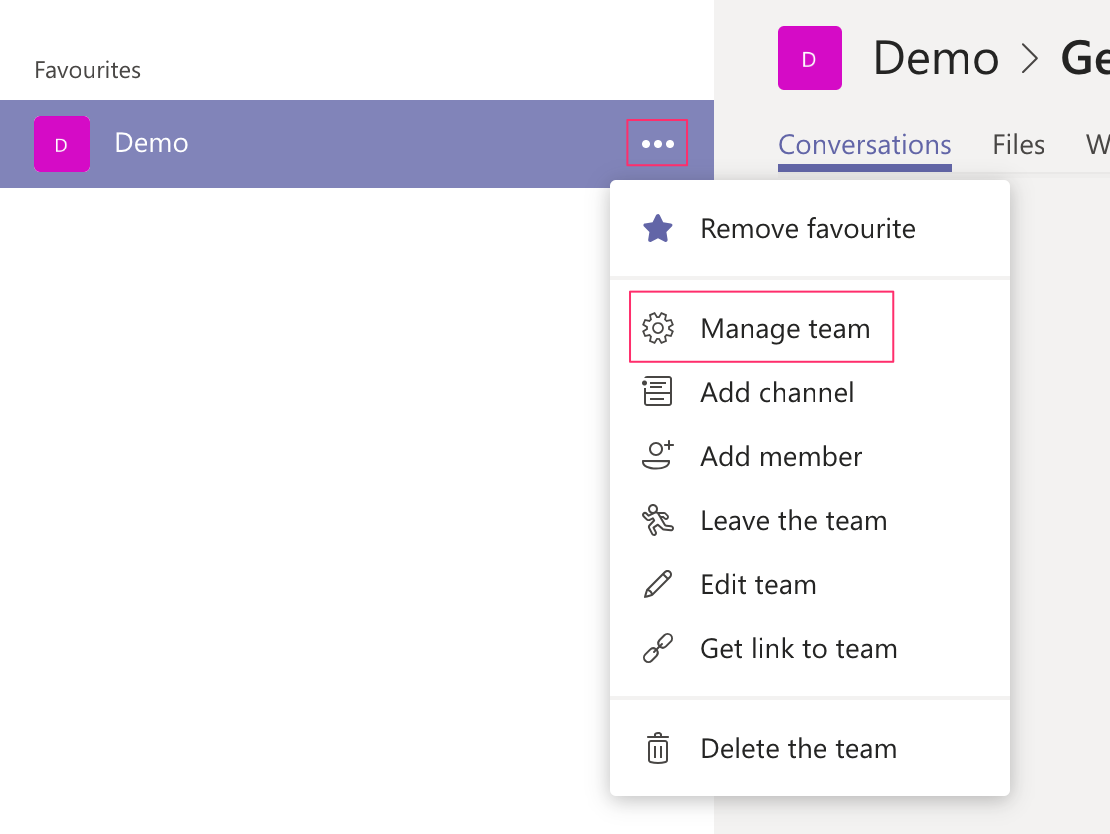
Now go to Microsoft Teams to a team where you would like to add the SPFx web part as a tab. Click on the ellipsis (3 dots) next to the team and select Manage Team.
In the Manage team page, click on the Apps tab. When you successfully switched on the option to allow sideloading of external apps, you now have an option available to ‘Upload a custom app’ in the right bottom corner:

Click on the Upload a custom app link. This will give you the option to select your package zip file and upload it to the App catalog of your team.

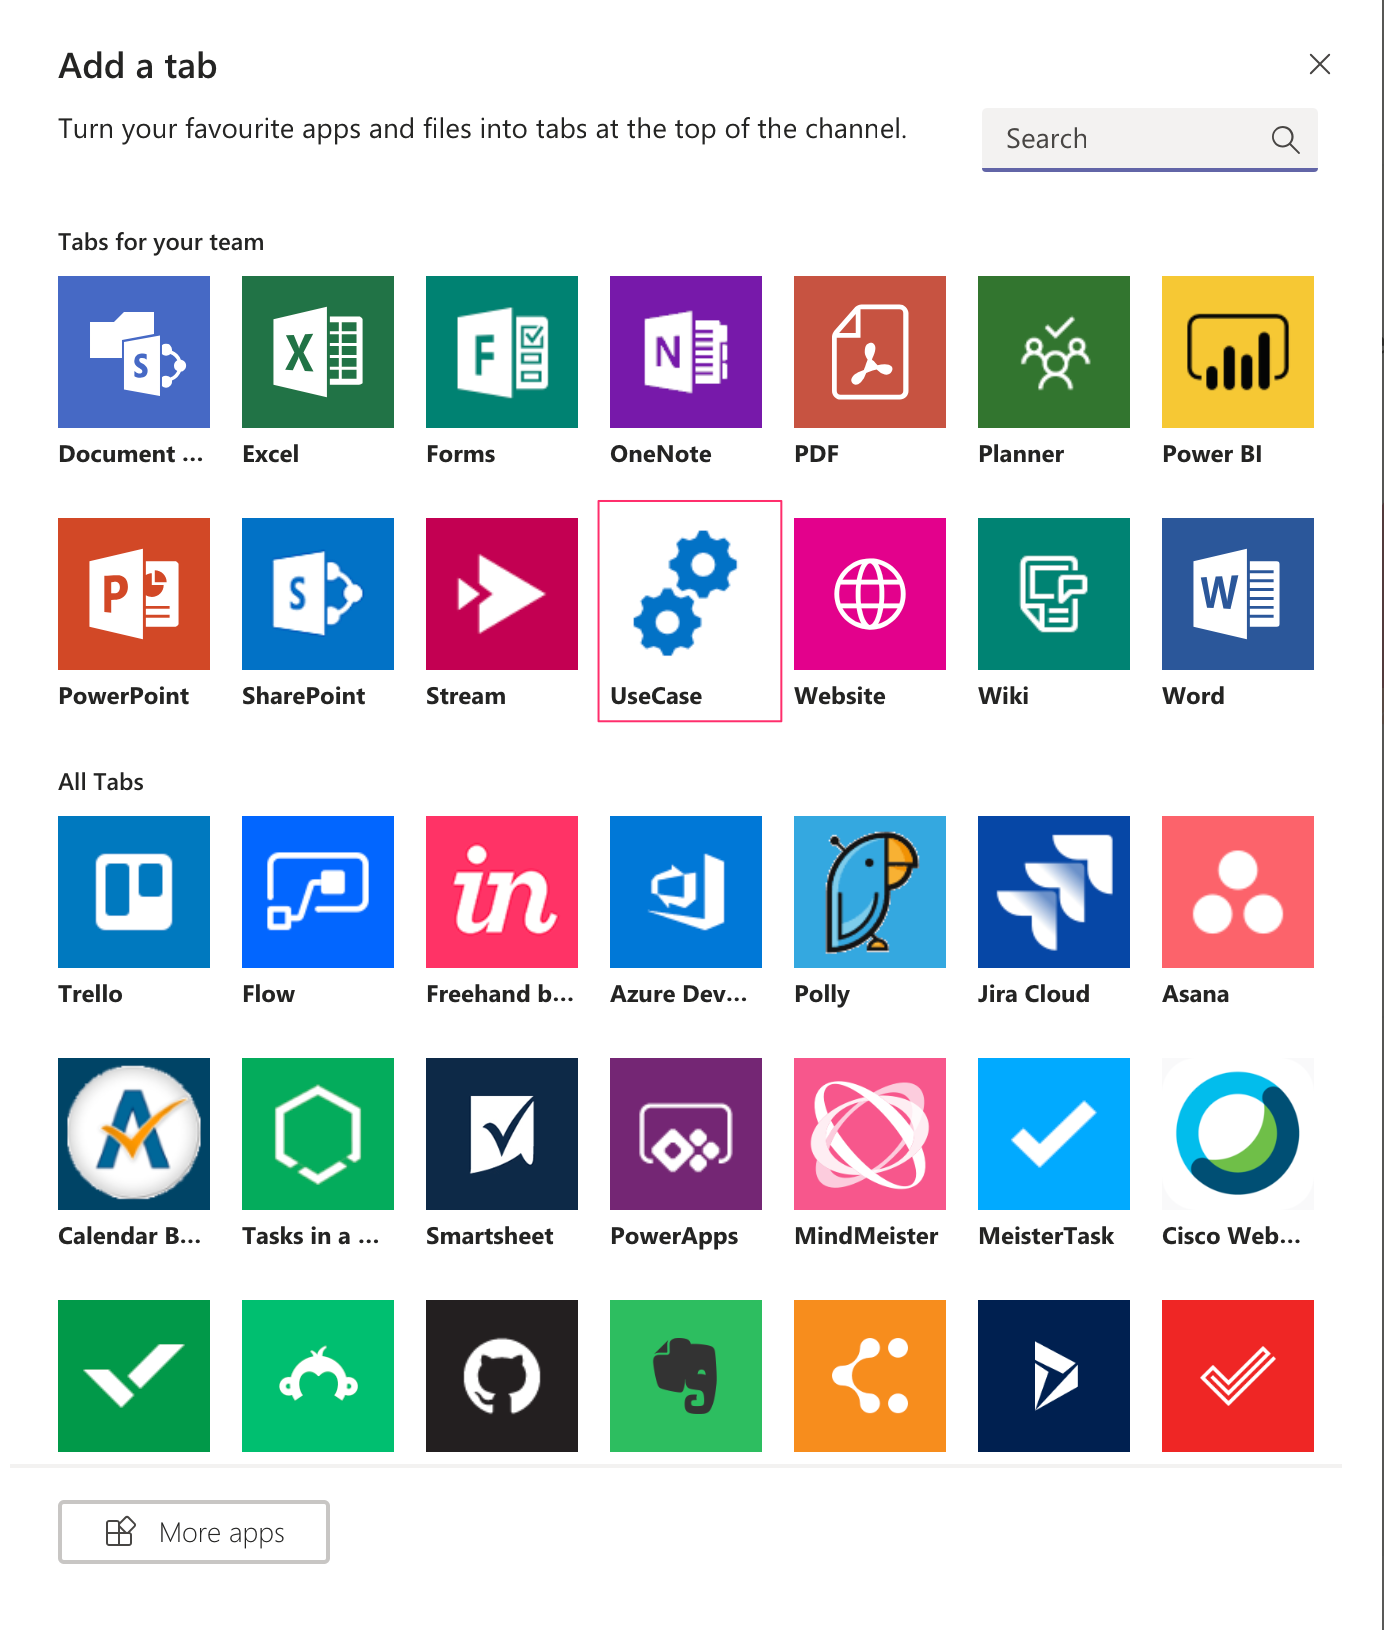
Add your tab
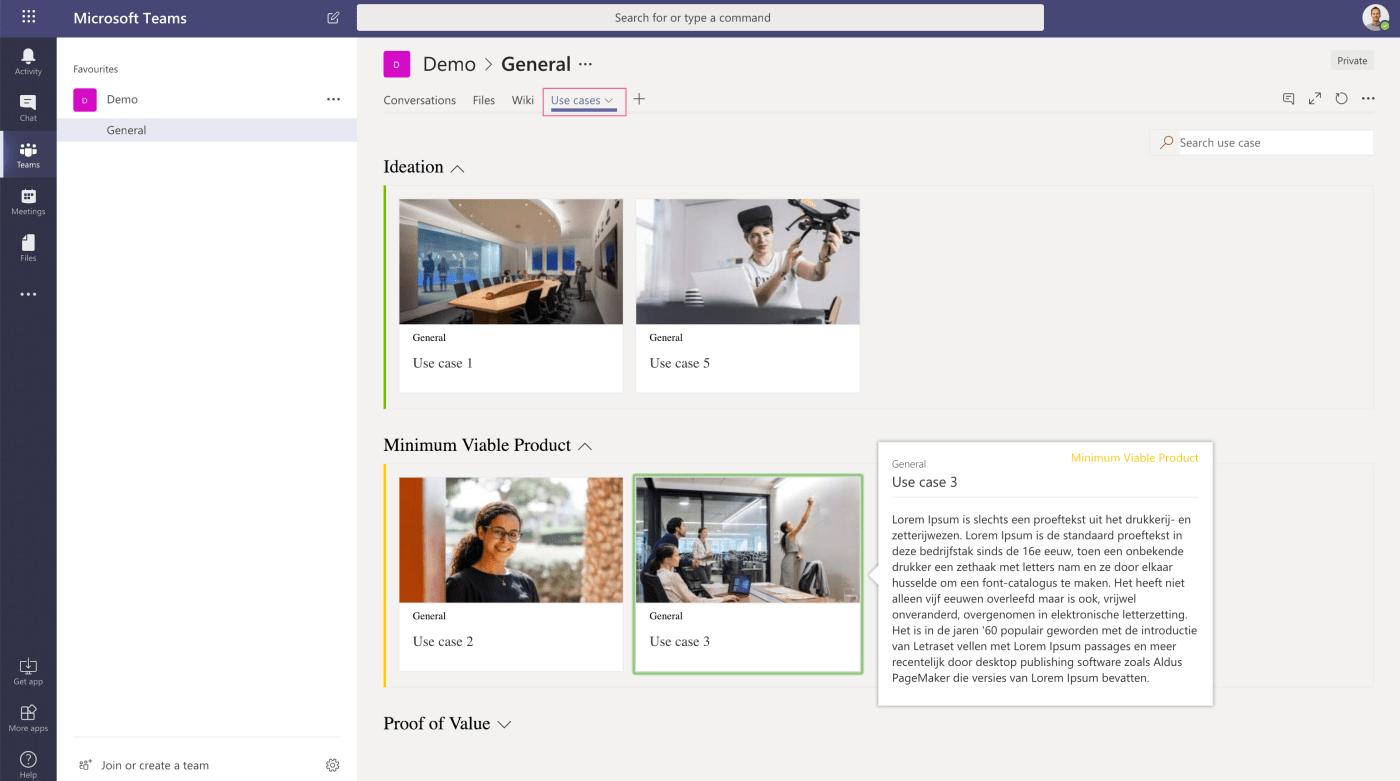
Now the SPFx web part is added to the App catalog within your team, it is also available as a tab. So click the plus sign (+) on the right side of your tabs, in order to add a new tab. Notice the SPFx web part is available:
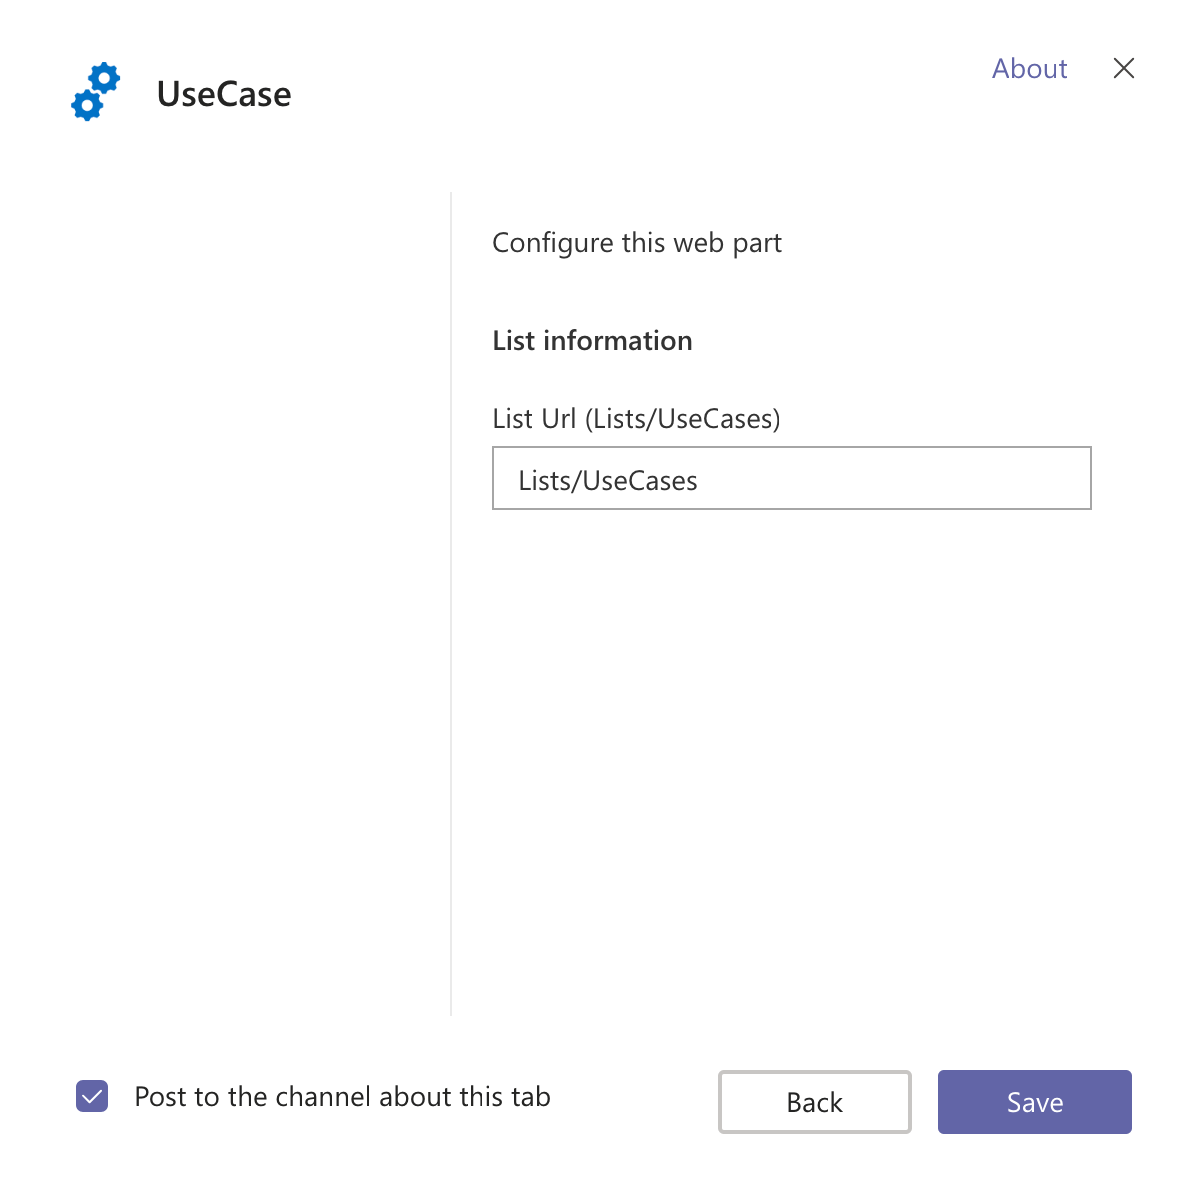
When you add the SPFx web part as a tab, a configuration page will be displayed. This page has the same options as on your web part pane when you configure it in SharePoint.
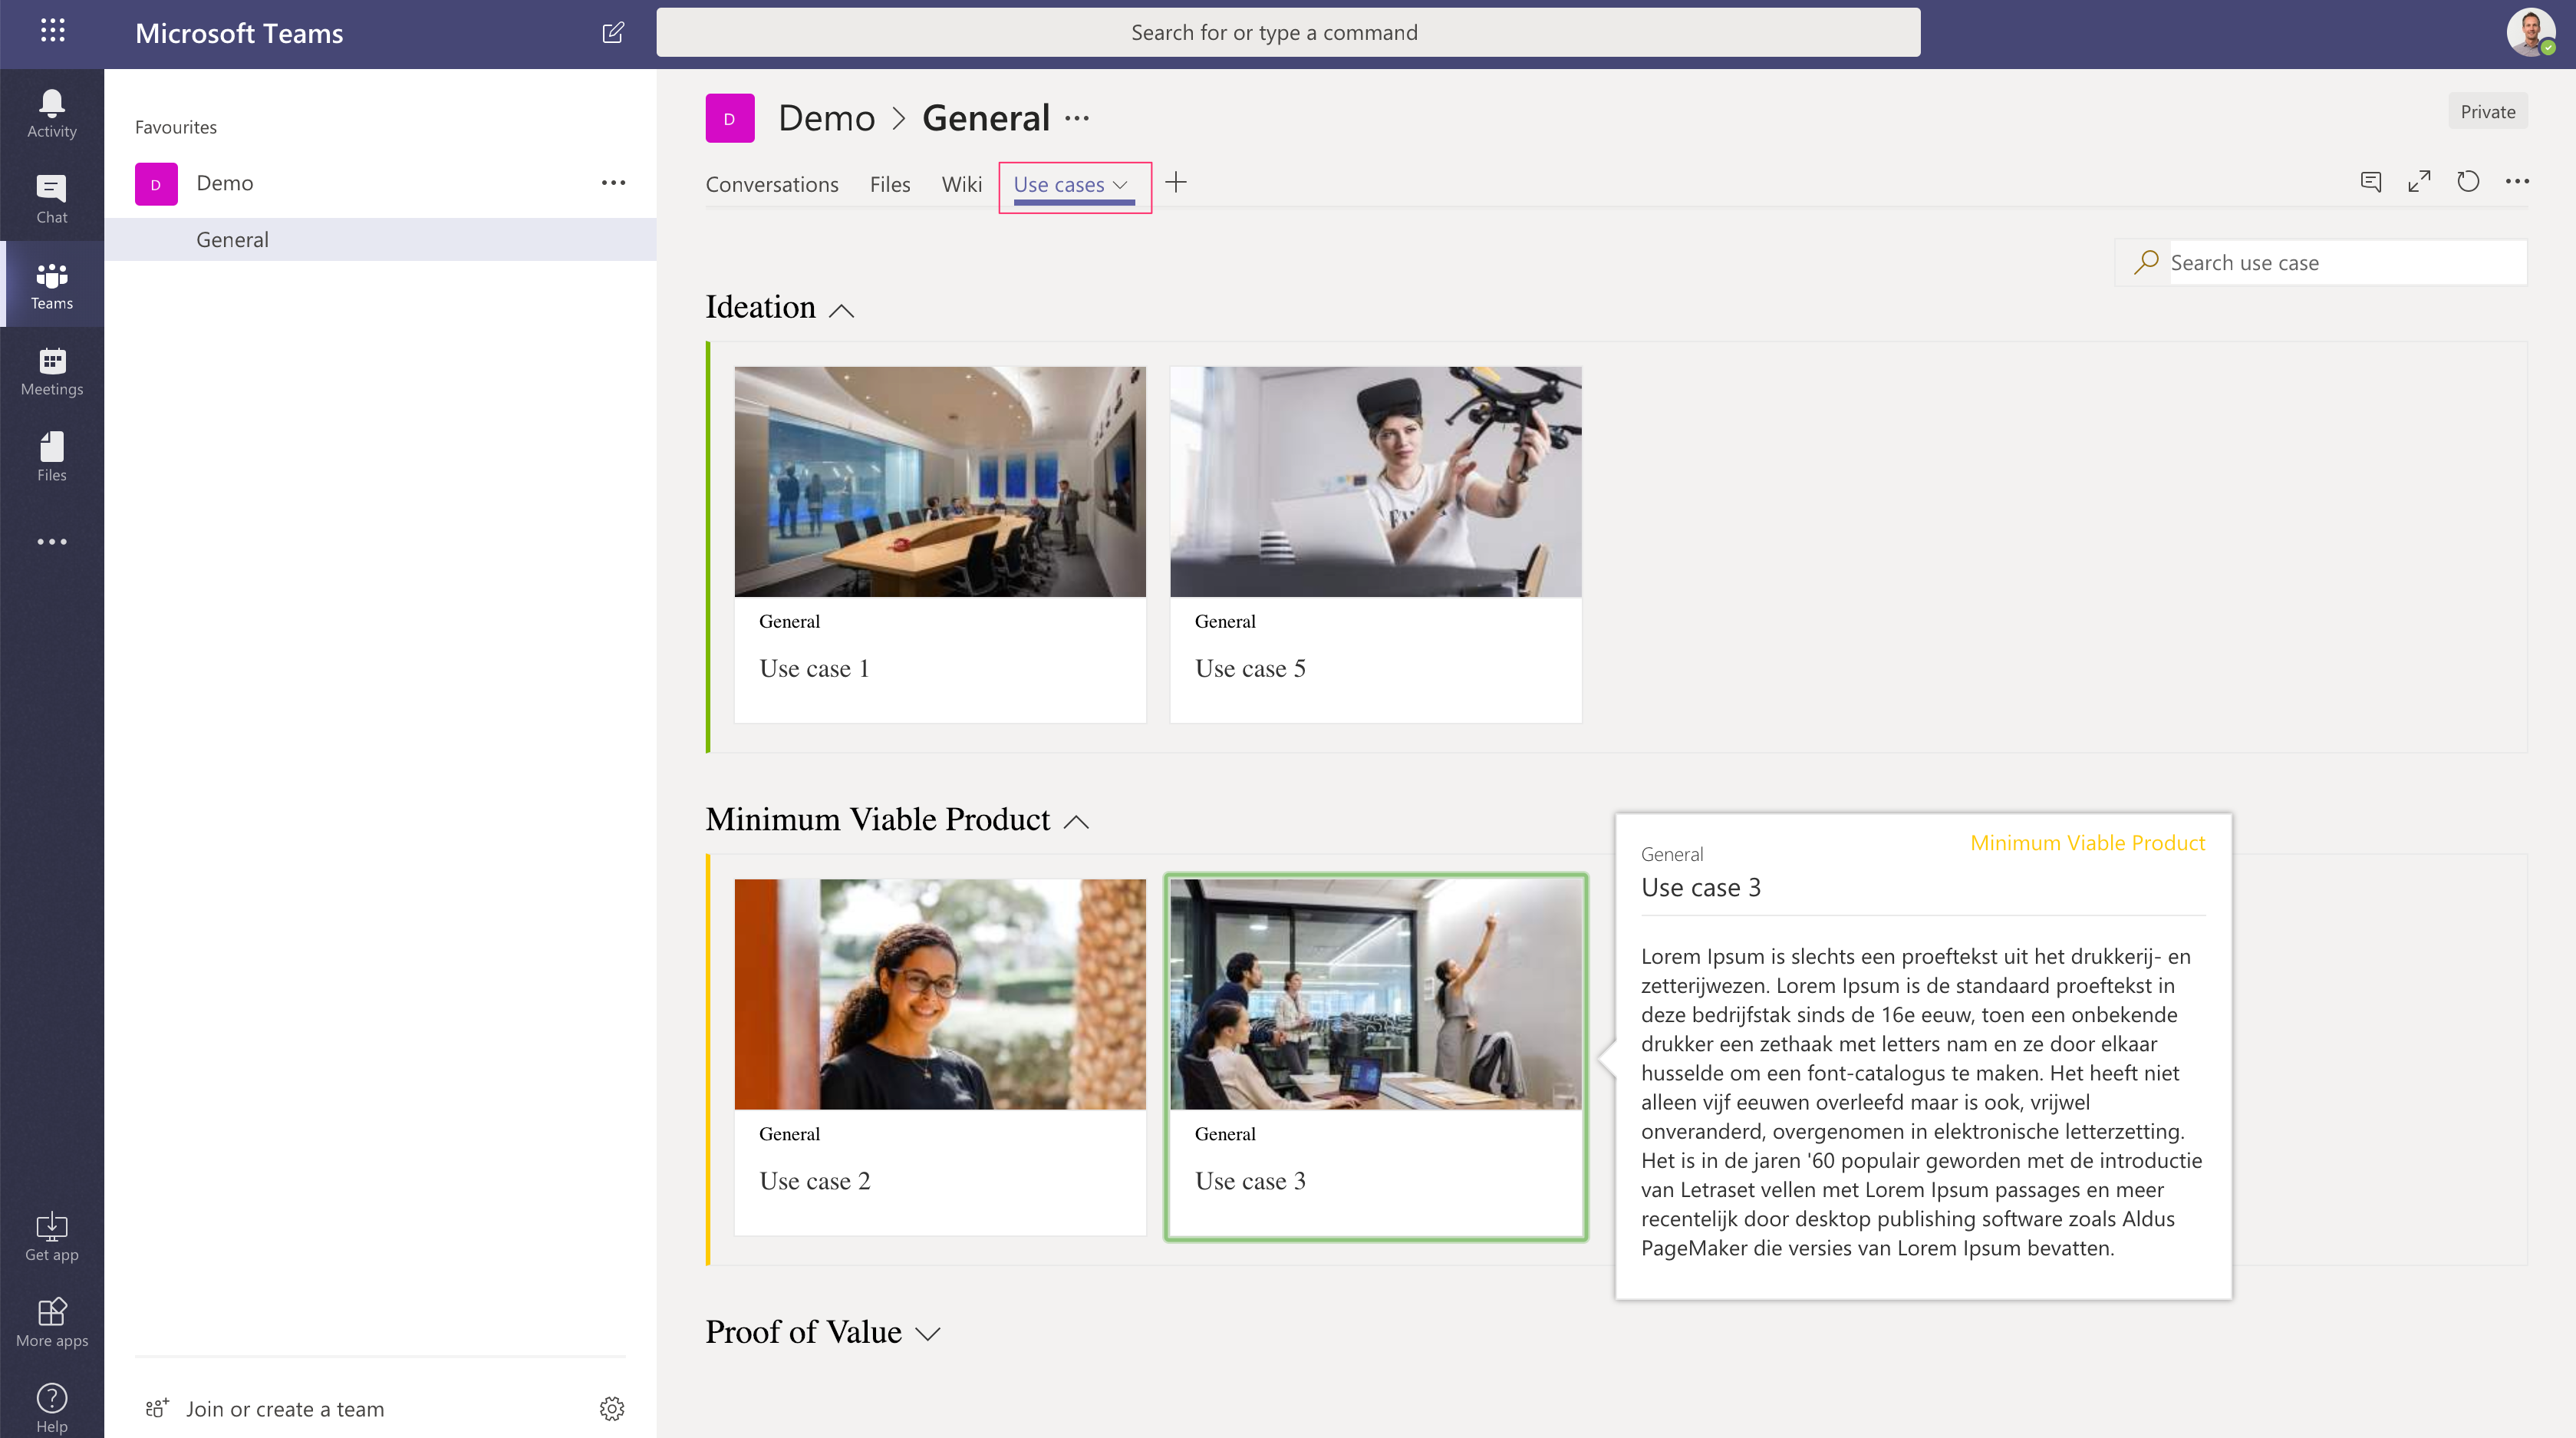
Click the ‘Save’ button and your web part will be displayed as a tab in your team:
Teams manifest file
So where does the magic happens? The actual SPFx web part is hosted in SharePoint Online. The teams manifest file within the teams package, describes how to load this web part into teams. There are 3 important sections within the manifest file I would like to point out.
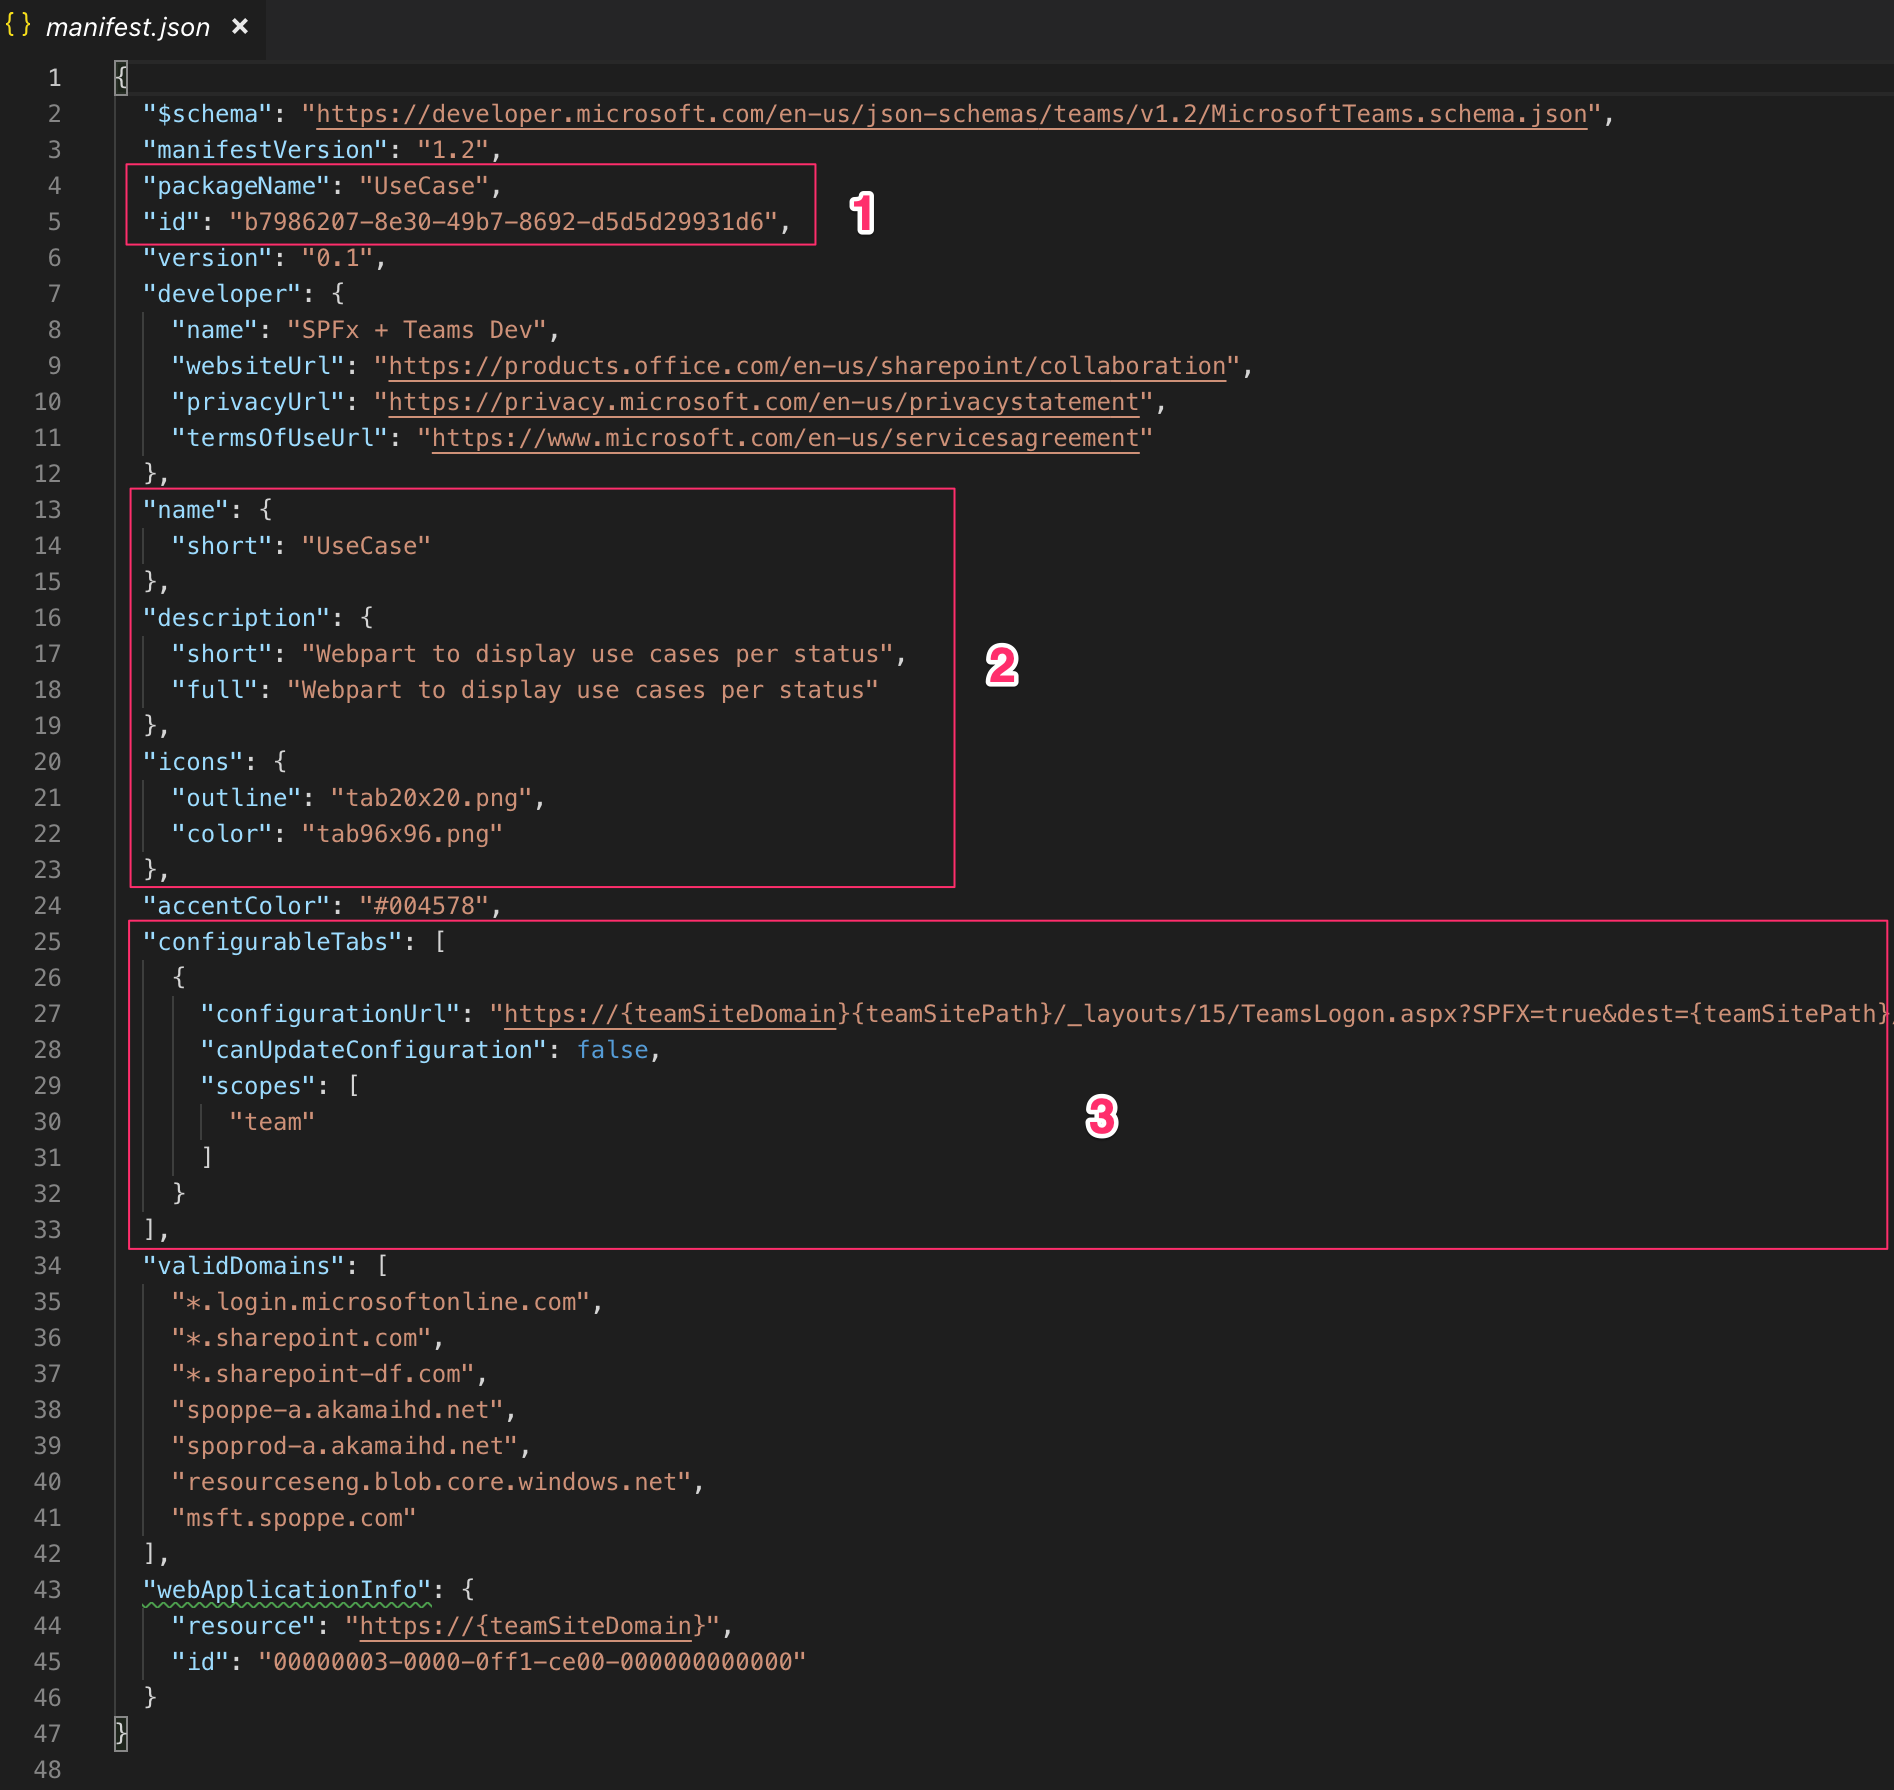
- This section holds the package name and the id of the web part. This id is the same as the id in your web part manifest file. So that’s the connection to the web part to load.
- This section holds the name, description and icons as it will appear in Teams. So in order to make your app appear differently in the App catalog, this is the place to edit. The icons match to the icons in your ‘teams’ folder.
- This section holds the url to your Site collection connected to your team. Not only the Site collection, but a _layouts page ‘TeamsLogon.aspx’ is called with a ‘dest’ query string parameter holding a _layouts page called ‘teamshostedapp.aspx’. Next to this there are some other parameters. Let’s look into the actual url:
"configurableTabs": [
    {
      "configurationUrl": "https://{teamSiteDomain}{teamSitePath}/_layouts/15/TeamsLogon.aspx?SPFX=true&dest={teamSitePath}/_layouts/15/teamshostedapp.aspx%3FopenPropertyPane=true%26teams%26componentId=b7986207-8e30-49b7-8692-d5d5d29931d6",
      "canUpdateConfiguration": false,
      "scopes": [
        "team"
      ]
    }
  ]
The TeamsLogon.aspx is used to authenticate and with the current user to the SharePoint Online site. The TeamshostedApp.aspx page will render the actual web part using the componentId query string parameter, which point to the web part id in the manifest. Further more you can see there is a scopes property, which for now is only available for team. So we can only add a SPFx web part at team scope, not at personal scope (yet).
Summary
Being able to host your SPFx web parts into teams is a really great effort the Microsoft Teams and SharePoint team created. You only have to create a web part once and you can use it on both platforms. When running a SPFx web part in Teams, you can also use a Teams context, instead of a SharePoint context. With this you could even go a step further and make the web part experience different depending the context you have (different styling, darm mode, etc.). You can even access some Teams properties like the members, etc. and use this in your web part. As you have seen in this blog post it is really easy to package and install your SPFx web part to Teams.


July 9, 2020 at 4:23 pm
Hi – great article. I’ve been experimenting with this and can’t find the difference between using this and just adding a Sharepoint page as a tab, using the Web page tab. You say it can harness Teams properties? Do you know of any docs that show how to do this?
LikeLike
July 28, 2020 at 1:19 pm
Hi Tom, thank you for your comment. Big difference between using a tab to show a SharePoint page and using a SPFx web part as a tab, is the SharePoint page will show you much more and can have several web parts on it. It’s more like iFraming a whole page versus showing just a piece or an application. About harness Team properties, maybe below Microsoft article will help:
https://docs.microsoft.com/en-us/learn/modules/sharepoint-spfx-teams-dev/5-exercise-conditional-logic
It is using the Microsoft Teams context available to you in SPFx. With it, you could retrieve the Team Id and Channel Id for instance and then use an API call to the Graph using these Ids to retrieve information or to Post information, etc. Does this makes sense?
LikeLike